A year and a half have passed since the onset of the coronavirus pandemic and enforced lockdowns. Stuck indoors with nowhere to go, many have developed new hobbies.
From my home in Las Vegas, I’ve dabbled in baking bread with natural yeast, making miso, pickling, and growing my own vegetables. But from all these newfound pastimes, one has proved particularly exciting: making sake with MiCURA, a homebrewing kit from Japan. I was already a big fan of sake, but never imagined that I’d be able to brew it myself in my own home.
Compared with purchasing sake at a restaurant or liquor store, homebrewing indeed offers new avenues of enjoyment. Here’s how my sake-making journey went:
With the materials to hand, getting started is a breeze
To begin my homebrewing adventure, I purchased the MiCURA Kotohajime Ver 1.1 “Crisp” Complete set. This kit is meant for beginners and contains 60% polished rice for brewing junmai ginjo sake. The package contains rice, a koji packet, an acrylic container and other brewing materials. Honestly, the kit looks as much like a science experiment as it does sake in the making. The kit I purchased in October 2020 contained vaguely-labelled “Japanese rice” as the only option, but the current kits now offer a choice between high-quality yamadanishiki or gohyakumangoku sake rice.
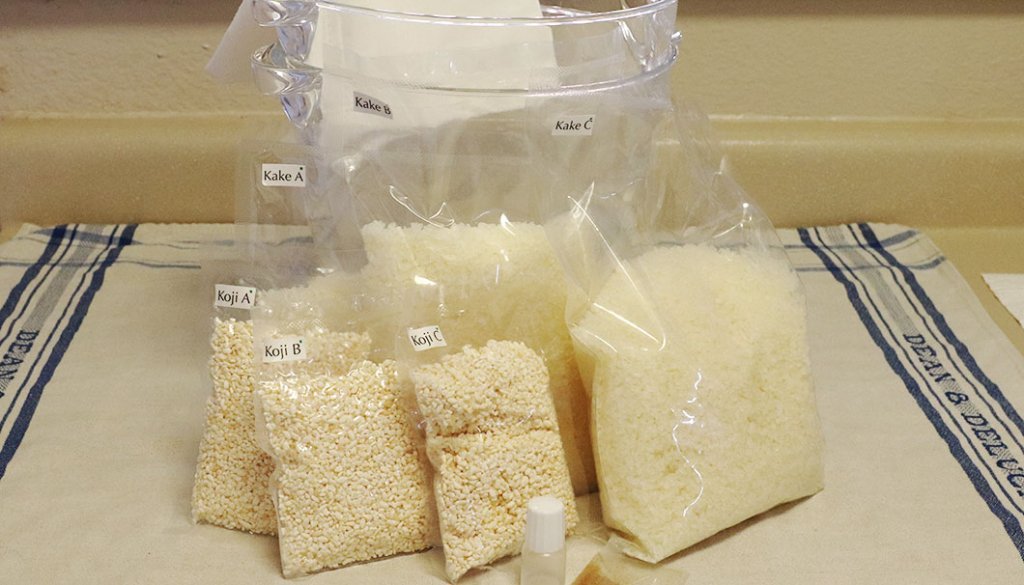
The bag for the sake mash is woven from the same material used in the fukuro-tsuri or “hanging bag” method of straining high-end sake drop by drop. The sake bag is also designed to match the size of the mash container.
A few items are not included in the kit, but these should be easy to procure.
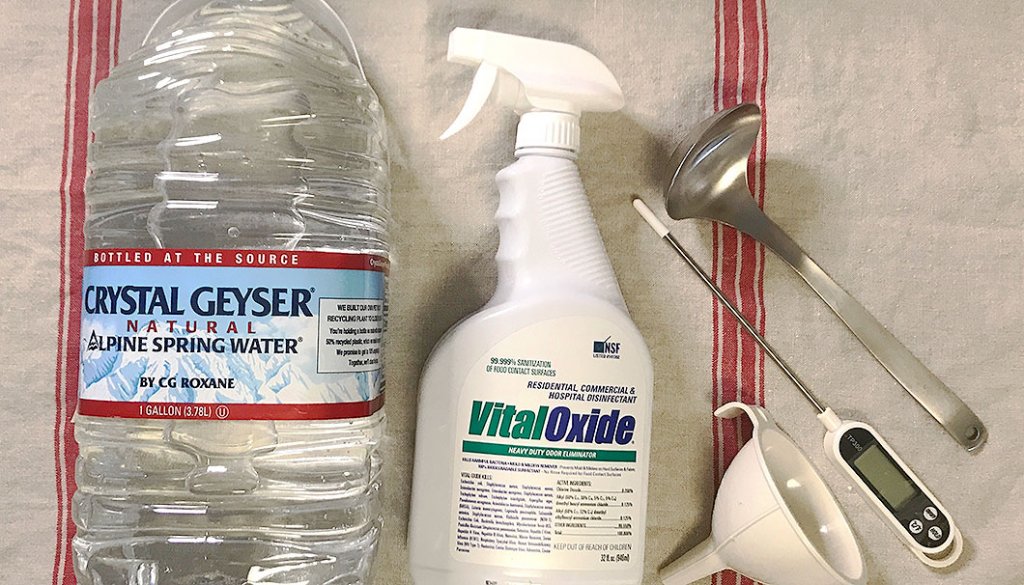
In fact, the only item I had trouble with was the refrigerator.
In Las Vegas, where I live, summer temperatures frequently exceed 40°C (104°F), so a refrigerator is essential to keep the fermenting brew at the desired temperature of around 10°C (50°F). Initially, I blithely assumed that sticking the mash in my regular old fridge would do the trick.
But, the sake set contained a warning to the unwary: “Please do not store any natto (fermented soy beans), pickles, yoghurt or similar items together with the sake mash in your refrigerator.”
It turns out that the microorganisms in fermented foods can interfere with the sake-making process. Unfortunately, my fridge typically contains lots of fermented foods, including bread baking yeasts, natto and pickles.
Fortunately, MiCURA customer service was always happy to answer my queries, so I sent them an email and received the following reply: “If you regularly store fermented foods in your refrigerator, it is possible that various microorganisms from these foods may be living inside. For this reason, we recommend storing your sake mash in a separate, smaller refrigerator.”
Heeding this advice, I purchased a mini fridge and, finally, got to work brewing.
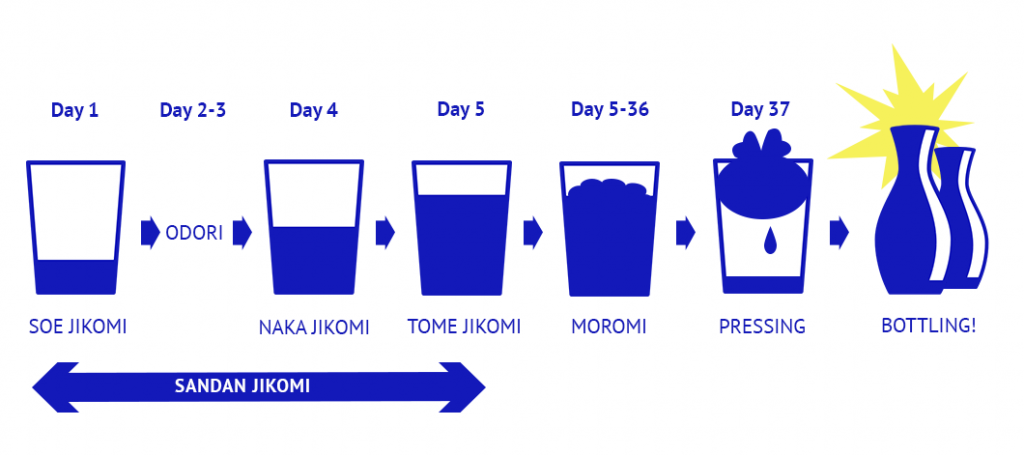
Preparing the mash in just three stages
The MiCURA kit is beginner-friendly, with rice you can use straight out of the bag and handy materials that eliminate the need to make koji or your own yeast starter. By cutting out the more labor-intensive and time-consuming steps of the process, MiCURA lowers the bar to entry for sake-making.
I began the brewing process in earnest on July 29.
The first step is to prepare the mash. This is done in three stages, whereby water is gradually added to a fermenting mixture of rice and koji while the temperature is gradually lowered.
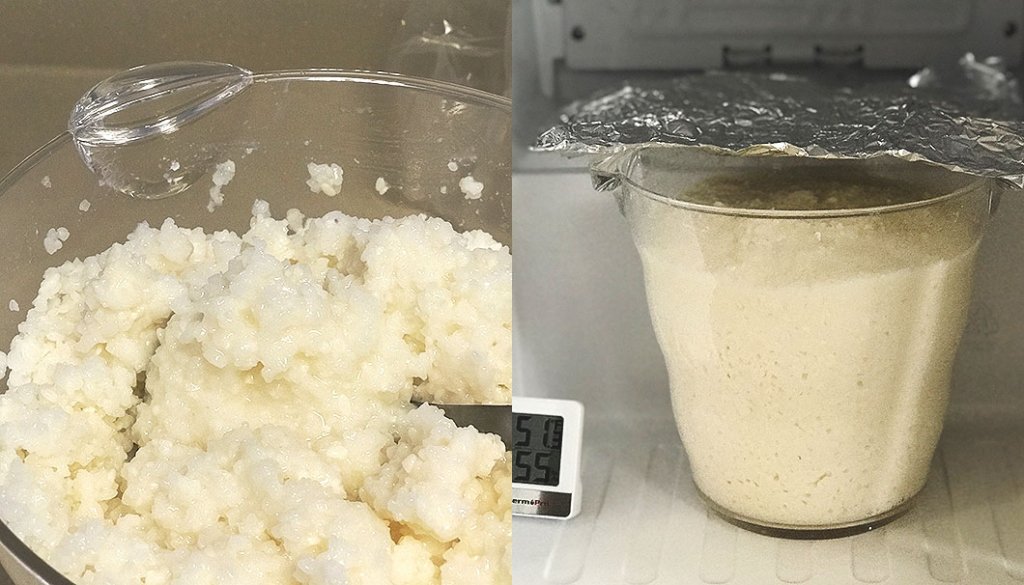
Day 1: Stage one of the mash preparation
Firstly, I mixed the koji, water and lactic acid to make mizu koji, then left the mixture to sit for about two hours. Next, I used warm water to activate the yeast, then added that to the mix. After 30 minutes, I added more rice.
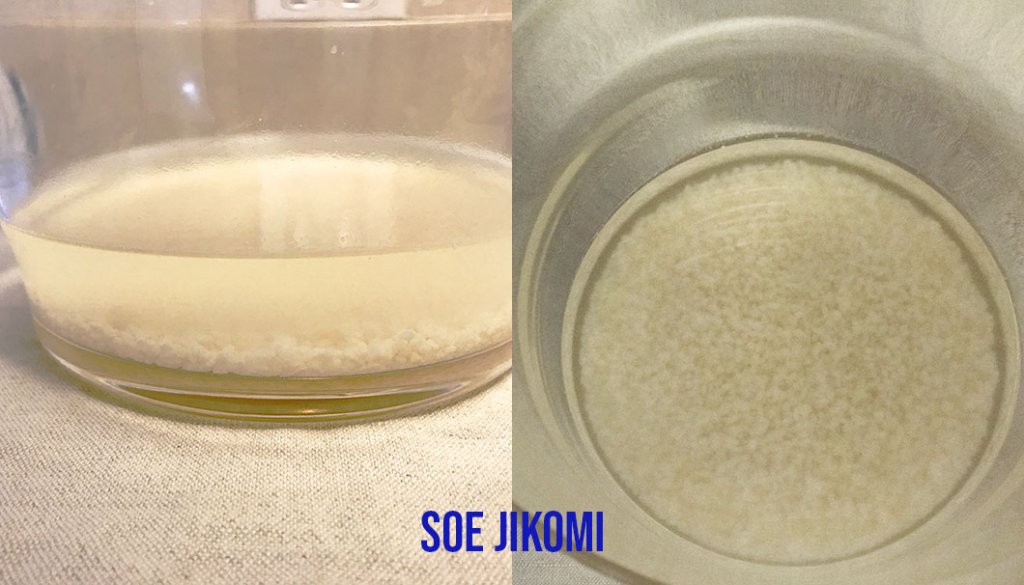
The enzymes from the koji dissolve in the water, converting the rice starch to sugars that help the yeast to multiply.
I wanted to set the temperature of the sake mash at 12°C (54°F), but my refrigerator settings don’t go above 10°C (50°F), so I left the refrigerator door slightly ajar.
The next two days are hands-off, and consist of simply resting the mash as is.
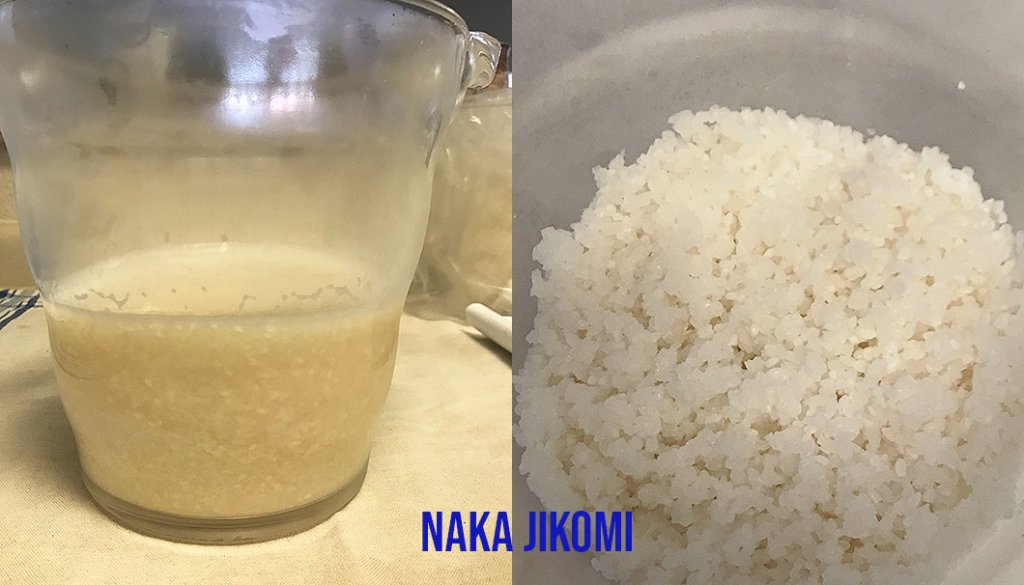
Day 4: Stage two of the mash preparation.
This time I added roughly twice as much rice, koji and water as before.
Day 5: The final stage of mash preparation.
The sake mash is now about three or four times its initial size.
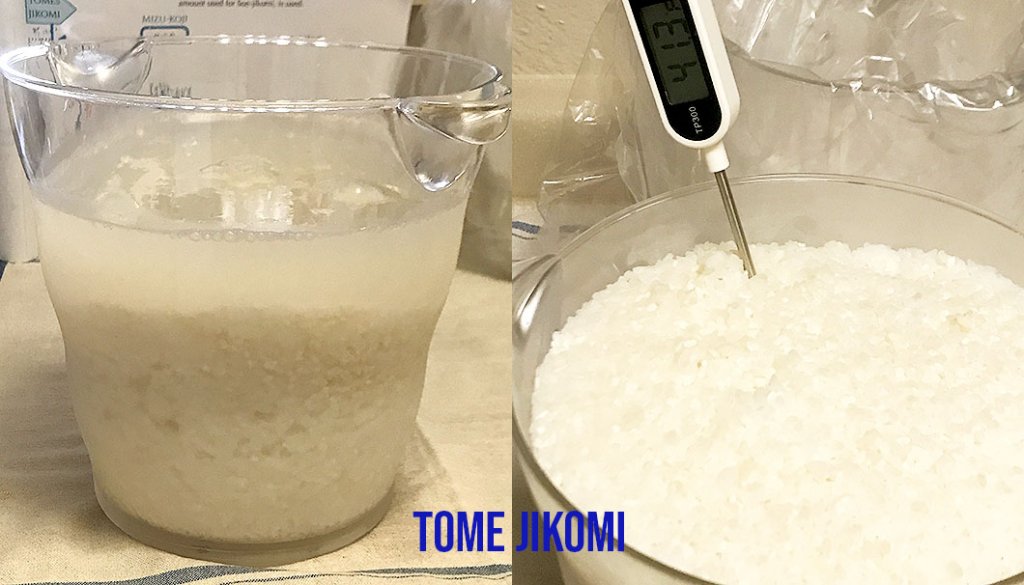
This was the final step in preparing the mash, but the results still did not look anything like sake. I was slightly worried that something might have gone wrong.
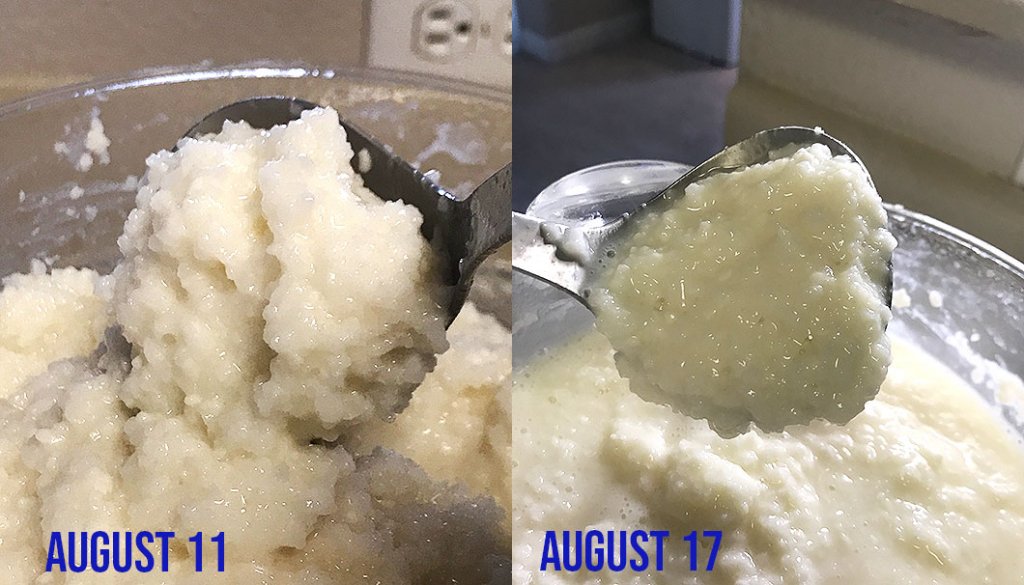
A month checking the ever-changing mash
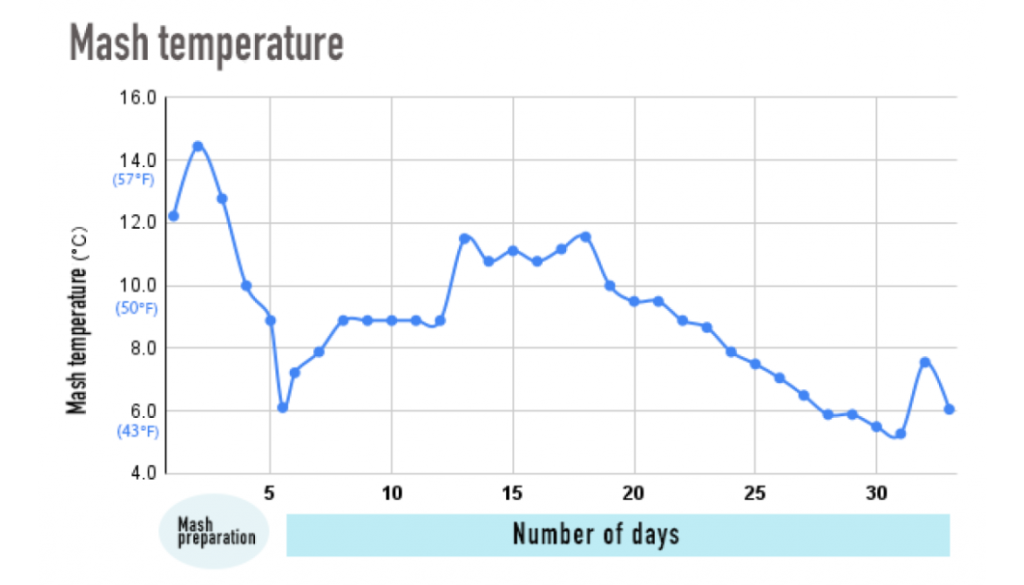
I completed the third and final stage of mash preparation on August 1, then stored the mash in my fridge for 33 days, stirring occasionally and keeping tabs on the aroma and flavor.
The MiCURA instruction booklet explains that you can brew delicious sake simply by storing the mash in the fridge and stirring. However, you can produce even better sake by carefully controlling the temperature like professional brewers do.
Since I had bought a mini-fridge especially for making sake, I decided to try my hand at temperature control. The temperature needs to be kept between roughly 6°C (42.8°F) and 10°C (50°F). It should be increased gradually during the first 10 days, held steady for another five, then gradually lowered after that.
Fermentation begins to peak between days 11 and 15, when the temperature should be kept even. During this period, I was greeted by a gentle whiff of sake each time I opened the fridge door.
From day 16, fermentation activity crests. From this point on, I gradually lowered the temperature.
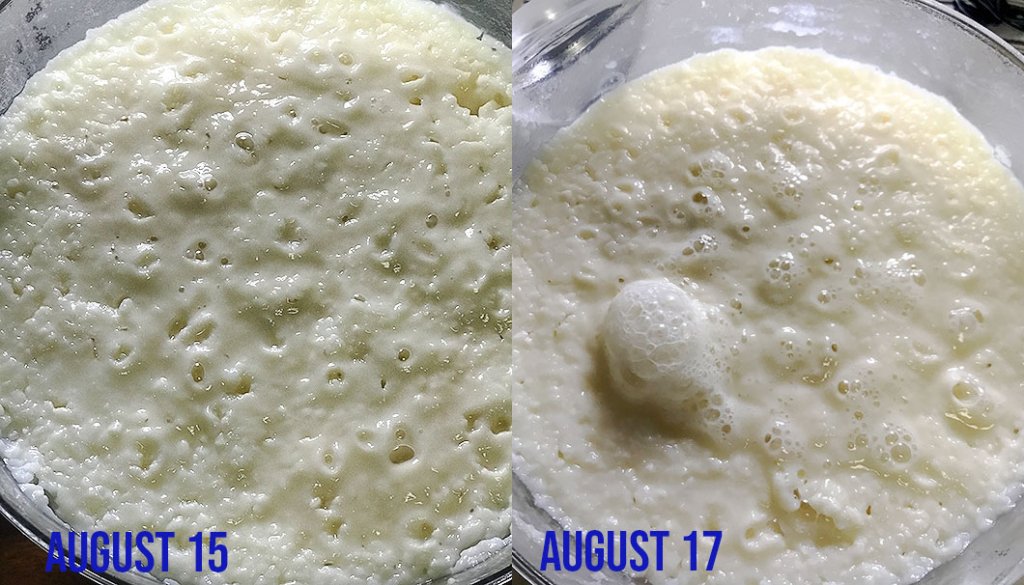
Just like when baking hotcakes, small bubbles start to appear in the mix at first, which later turn to a foam-like consistency a few days later. The mash now has a tart aroma and sake-like flavor.
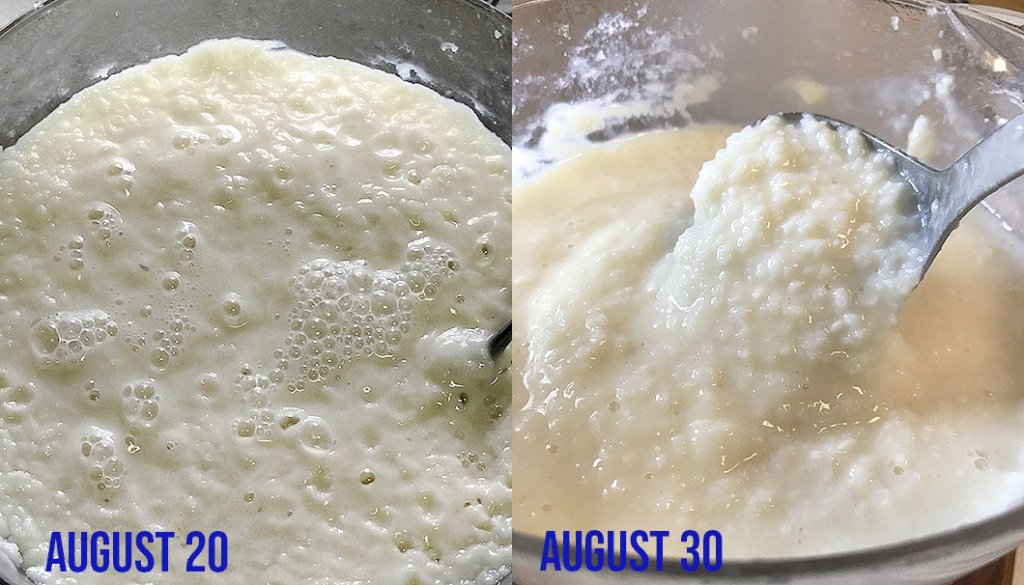
A few days later, the mixture begins to bubble away energetically. The mash tastes lively, leaving a tingling sensation on the tongue.
At this point, fermentation slows to a near-stop. Approaching day 30, the mash has a very tart flavor and floral aroma.
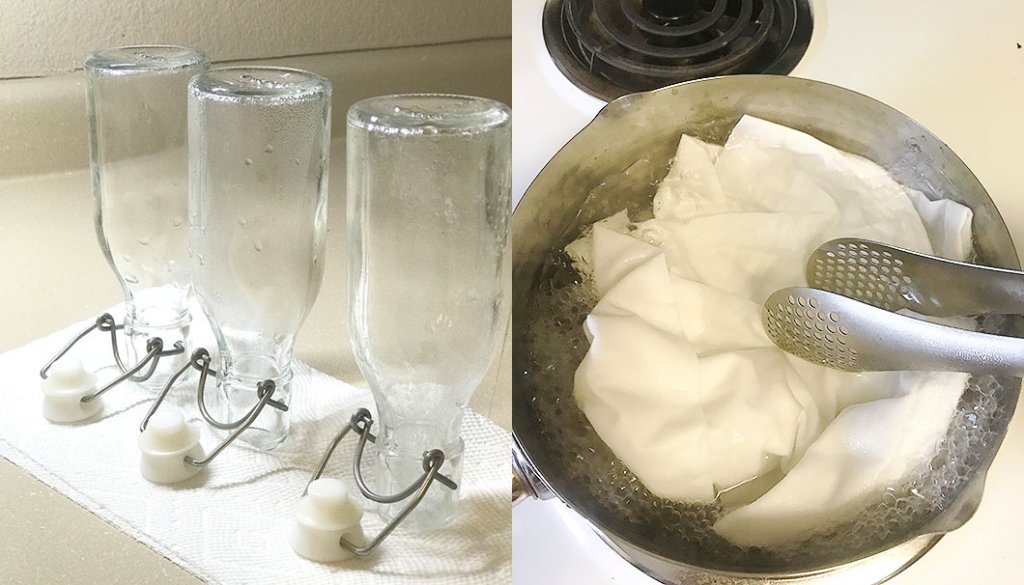
On day 33, I boil the bottles and sake bag to sterilize them in preparation for pressing.
The graph below shows the temperature of the mash over the course of the month. The actual temperature inside my refrigerator didn’t always match the temperature setting, so there were times when I had to open the door and check the temperature manually. On reflection, I may have been better off using a wine cellar-style mini-cooler that allowed for more precise temperature control.
Sampling freshly brewed raw sake is one of the perks of homebrewing
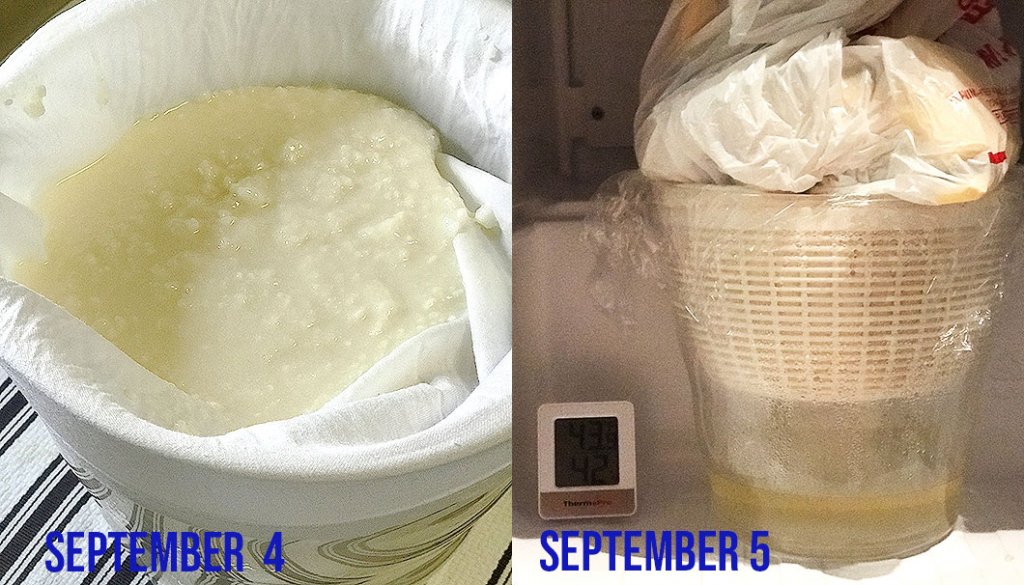
On September 4, it’s finally time to press the sake. After a month of diligent temperature checks, it’s finally time to turn this stuff into genuine sake.
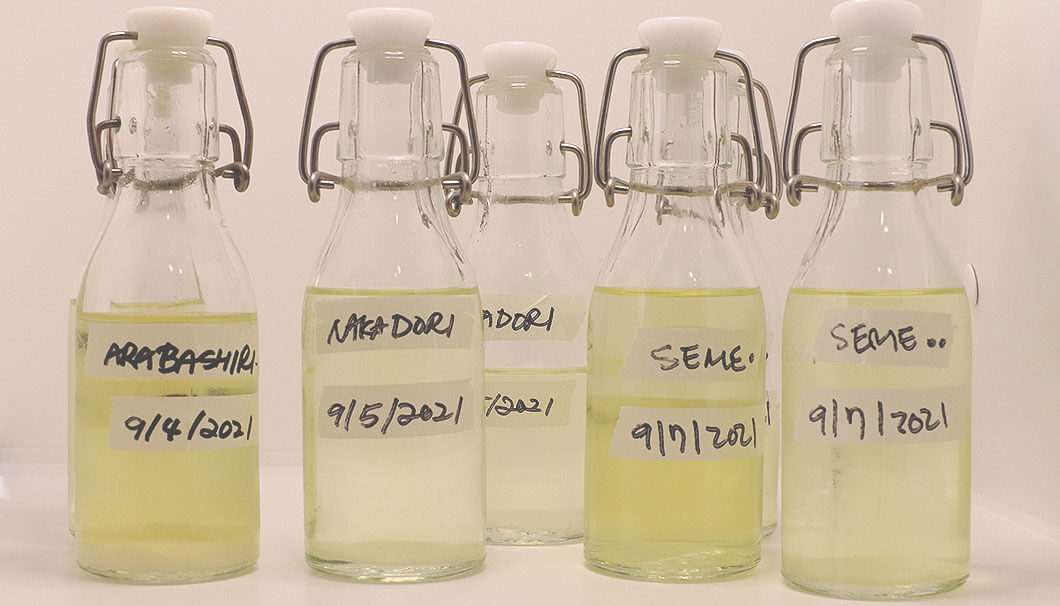
First run: arabashiri
The first step is to transfer the mash to the sake bag and place the bag in the included container. I then let the container sit for about three hours without applying any pressure. During this time, the sake is released naturally. This method applies the same principle as the previously mentioned “hanging bag” technique used for high-quality sake, in which the variously sized particles form a filtration layer inside the bag. Sake extracted this way is called arabashiri or “rough run” and is somewhat cloudy, containing lees.
Sampling the sake at this stage reveals a fresh, strident flavor. Although I can detect a fruity sweetness reminiscent of peaches, the brew also creates a surprisingly tingly sensation on the tongue.
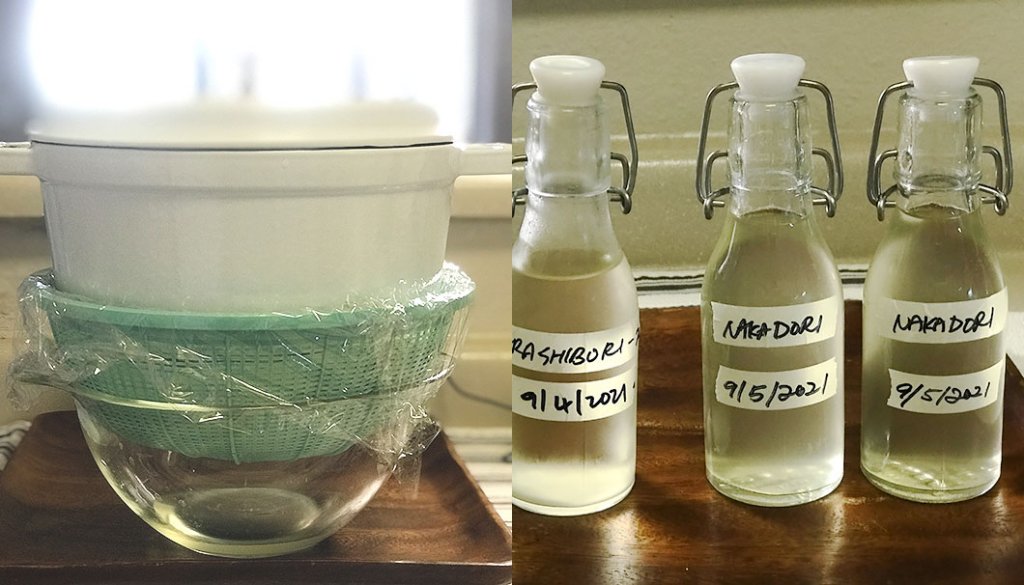
I transferred the sake bag to a sieve and let it sit for a further three hours or so. The brew was now less sweet than before, with a mellower flavor.
Second run: nakadori
Next, I wrapped the container in clingfilm and applied pressure using a bag containing about 2kg of rice as a weight. I let the container sit like this for a full day. The sake extracted during this stage is called nakadori, or “middle pressing,” and is clear, containing less lees. Compared to arabashiri, this sake is less intense with a slightly cream cheese flavor.
Last Run: Seme
In the last stage of pressing, much more pressure is applied to the mash. The word seme means something like “attack,” which expresses this idea succinctly. I asked MiCURA by email how much pressure is required, and they recommended about 7kg. About 5kg of this came from placing a cooking pot filled with water on top of the mash. I then let this apparatus sit for two days.
The resulting sake was very thick with a more balanced flavor than the previous two stages. The sake had a distinctive brie-like aroma and grew thicker over time.
The flavor and texture of the sake differ greatly depending on the pressing method. Sampling the flavors while pressing the sake is something that can only be experienced with homebrewing.
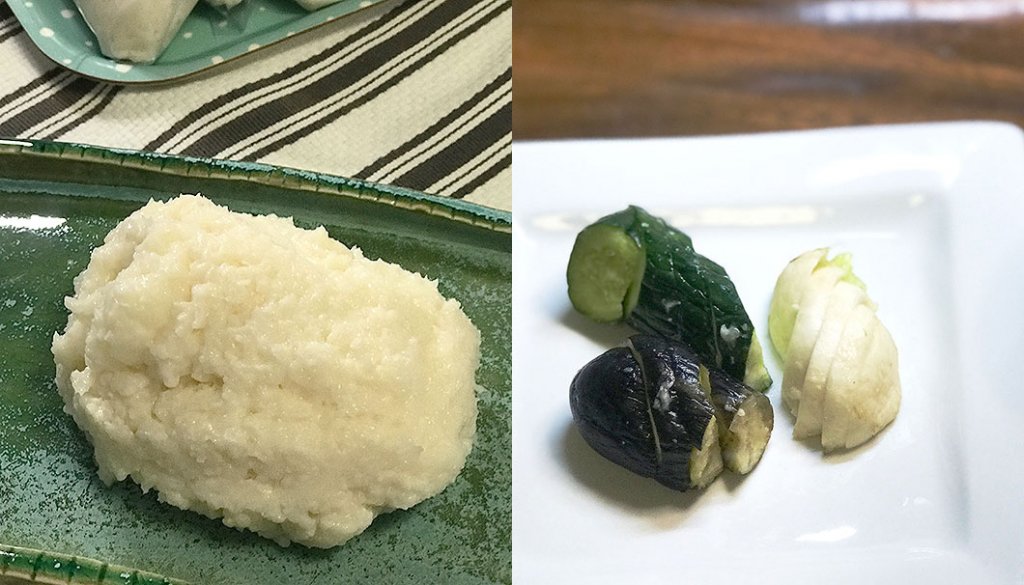
About sake lees
After I finished pressing the sake, I scooped out the remaining lees from the sake bag. In Japan, sake lees is sold as a product in itself, but my lees was stickier and contained more moisture than those made by the pros. This could be because I had not fully extracted the sake.
I mixed the lees with mirin, sake, miso and sugar, then used the mix to ferment some vegetables for about three days. The sake aroma was a bit strong, but the pickles ended up with a gentle, mellow flavor. Sake lees can also be used to make sweets and bread.
What I learned from homebrewing sake
During my month of homebrewing with MiCURA, I experienced first-hand how rice draws on the power of water, koji and yeast to create sake. It was fun to watch over the mash as it gradually evolved. Each day I found myself peeking inside my fridge with curiosity to observe the goings-on.
Homebrewing has changed my view of sake. When I next drink a junmai ginjo at a restaurant, I won’t just be thinking about how tasty it is. I will also have a greater appreciation for how the flavor was achieved, as well as a feeling of gratitude towards the brewers and their hard work.
Correspondent for this issue

Yoko Ishikawa
(Las Vegas, United States)
Yoko Ishikawa was born in Tokyo, Japan and has lived in Las Vegas, NV since 2001. She worked as a local tour operator before becoming a freelance writer: she is a certified Japanese Sake Adviser (SSI) and writes for the Japanese edition of SAKETIMES.
*Translated by D. W. Lanark
*If you would like us to send you monthly updates and information, register here.

Comments